Repositories
Creating an Image Repository
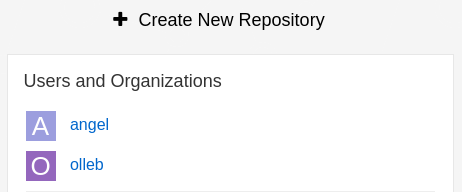
On the main Quay landing page:
-
Click the
Create New Repositorybutton.
-
Select the organization from the drop-down list, name the repository
kafka, and set the visibility toPublic.

-
Click
Create Public Repository.
Pushing and Tagging an Image
-
Pull an image from the public registry by running the
podman pullcommand followed by the image name.
podman pull quay.io/strimzi/kafka:latest-kafka-4.0.0-
Tag the image with a name and version number using the
podman tagcommand.
podman tag quay.io/strimzi/kafka:latest-kafka-4.0.0 ${QUAY_HOSTNAME}/olleb/kafka:4.0.0-
Sign in to your Quay repository using your account credentials, if you are not already signed in.
podman login ${QUAY_HOSTNAME}-
Push the image to the Quay repository using the
podman pushcommand.
podman push ${QUAY_HOSTNAME}/olleb/kafka:4.0.0-
Verify that the image has been successfully pushed to your Quay repository by confirming that the image is listed.

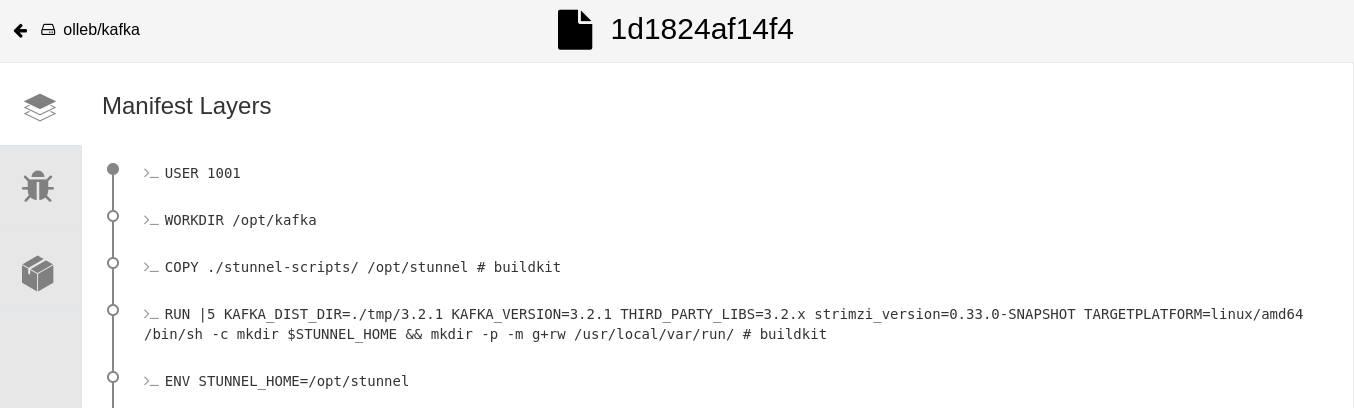
Inspecting Image Layers
-
Navigate to the
olleb/kafkarepository. -
Click the
Tagsicon. -
Under the
MANIFESTsection of the4.0.0tag, click theSHA256value to open the image layers dashboard.

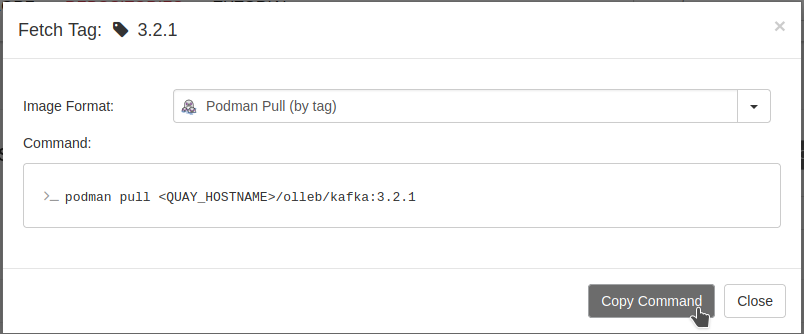
Pulling an Image
-
From the Quay dashboard, locate and select the
olleb/kafkarepository. -
Click the
Tagstab. -
Select any of the repository’s tags and click the
Fetch Tagicon.

-
From the Image Format drop-down menu, select
Podman Pull (by tag)and click theCopy Commandbutton.
-
Switch to a terminal, paste the command you copied from the Quay UI, and execute it. Ensure that
Podmanis installed on your system. Since the repository was created asPublic, no login is required to pull the image.
Rolling Back an Image
Quay provides a convenient way to review the history of tags associated with an image repository and to roll back to a previous version when needed.
-
Create a new image repository as previously explained. In this case, create a public repository named
olleb/rollbackon Quay. -
Build an image, tag it, and push it.
echo "FROM scratch" > Containerfile.rbk
podman build . -t rollback:1.0 -f Containerfile.rbk

podman tag localhost/rollback:1.0 ${QUAY_HOSTNAME}/olleb/rollback:latest
podman push ${QUAY_HOSTNAME}/olleb/rollback:latest-
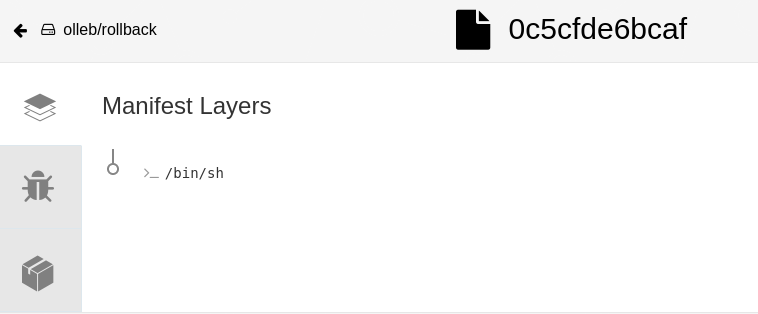
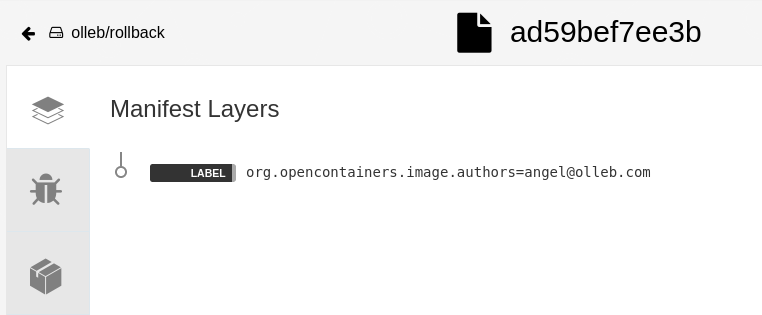
Verify that the image has been pushed to the Quay repository. Also, check the manifest digest and the layers.

-
Add a new layer to the
Containerfile, rebuild the image, and overwrite the previous one by tagging and pushing it with the same remote tag.
echo "LABEL org.opencontainers.image.authors=[email protected]" >> Containerfile.rbk
podman build . -t rollback:2.0 -f Containerfile.rbk

podman tag localhost/rollback:2.0 ${QUAY_HOSTNAME}/olleb/rollback:latest
podman push ${QUAY_HOSTNAME}/olleb/rollback:latest-
Verify that the new image has been pushed to the Quay repository, and check its manifest digest and layers in the Quay UI. You should observe that the manifest digest and layers differ from the previous image.

-
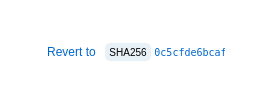
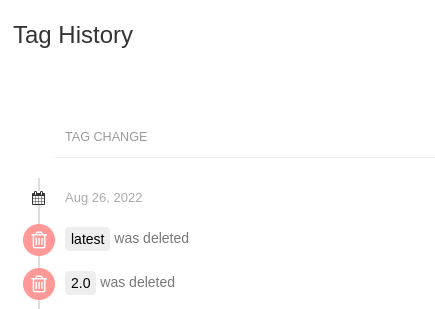
To roll back the image to the previous version, navigate to the Quay UI and click the
Tag Historyoption for the repository.

-
From there, select the tag of the previous image you want to restore, and click
Revert to ….
-
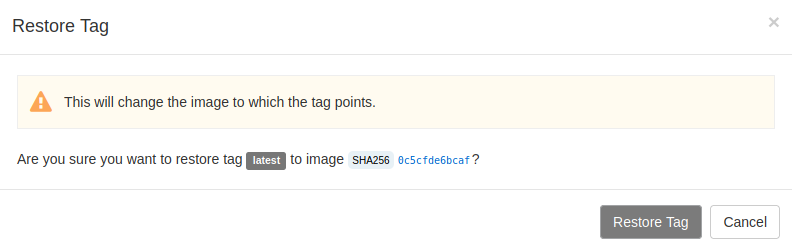
Click the
Restore Tagbutton. This will restore the tag to reference the previous image.
-
To verify that the rollback was successful, go to the
Tag Historysection in the Quay UI and confirm that the restored tag has the same manifest digest and layers as the previous image.

Image Expiration
To configure an image tag to expire in Quay at a specific time or date, follow these steps:
-
Create a new image repository as previously explained. In this example, create a public repository named
olleb/expiration. -
Build a
1.0image, tag it, and push it to theolleb/expirationrepository.
echo "FROM scratch" > Containerfile.exp
podman build . -t exp:1.0 -f Containerfile.exp

podman tag localhost/exp:1.0 ${QUAY_HOSTNAME}/olleb/expiration:1.0
podman push ${QUAY_HOSTNAME}/olleb/expiration:1.0-
The label
quay.expires-afteris used to specify the expiration time for a tag. The value can be defined in several formats, including a specific date and time, a relative time offset from image creation, or a relative time offset from tag creation. In this example, we use a relative time offset of5m, which means the image will expire 5 minutes after being tagged as2.0andlatest.
echo "LABEL org.opencontainers.image.authors=[email protected]" >> Containerfile.exp
echo "LABEL quay.expires-after=5m" >> Containerfile.exp
podman build . -t exp:2.0 -f Containerfile.exp

podman tag localhost/exp:2.0 ${QUAY_HOSTNAME}/olleb/expiration:2.0
podman push ${QUAY_HOSTNAME}/olleb/expiration:2.0

podman tag localhost/exp:2.0 ${QUAY_HOSTNAME}/olleb/expiration:latest
podman push ${QUAY_HOSTNAME}/olleb/expiration:latest-
At this point, the
olleb/expirationrepository contains two images and three tags:-
The
1.0image has the1.0tag. -
The
2.0image has the2.0andlatesttags. The2.0andlatesttags are marked as expiring soon.
-
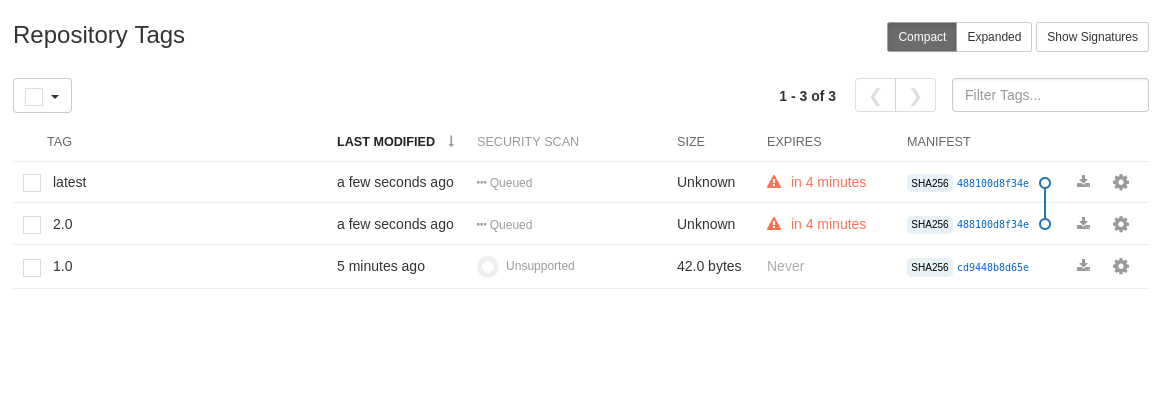
After 5 minutes, both tags will be automatically removed from the repository.

-
To manually configure an expiration time, select the
1.0tag. From the Actions drop-down list, select Change Expiration, and set the desired Expiration Date.

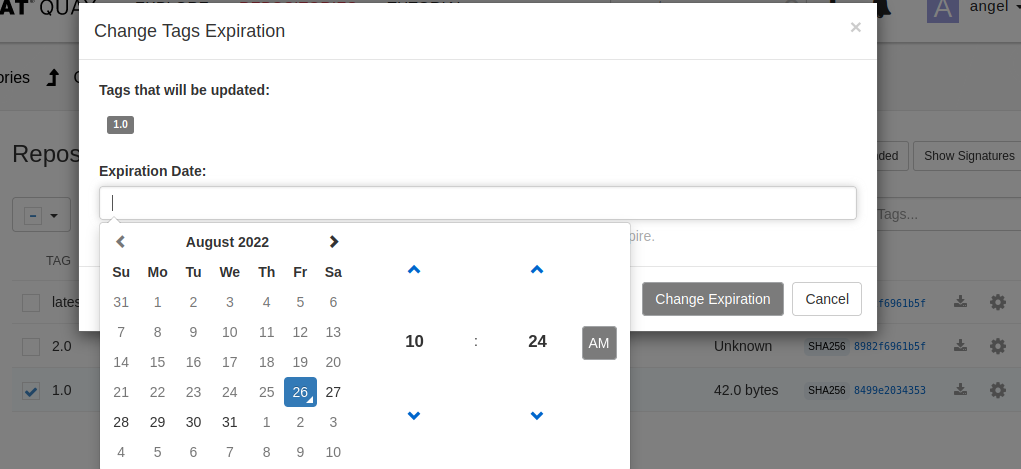
| Alternatively, you can set the expiration by clicking the Options icon and selecting Change Expiration. |
When a tag is about to expire, a warning message is displayed:

By default, the minimum expiration time is one hour, and the maximum is 104 weeks (approximately two years).
If you need shorter or longer expiration limits, modify the LABELED_EXPIRATION_MINIMUM setting in the Config Bundle Secret of your registry instance.
This property accepts values such as 60s (seconds), 5m (minutes), 24h (hours), 7d (days), or 2w (weeks).
|
When a tag expires, it is deleted automatically.
However, even after a tag is deleted, the corresponding image can still be restored.
When a tag is deleted and no other tags reference the same image, the image is not immediately removed — it is marked for garbage collection, which by default occurs after 14 days (2w).
Quay’s garbage collection worker runs periodically and removes expired images once the configured Time Machine retention period has passed.
Because the image was stored under the olleb organization, you can check that value by navigating to /organization/olleb?tab=settings.
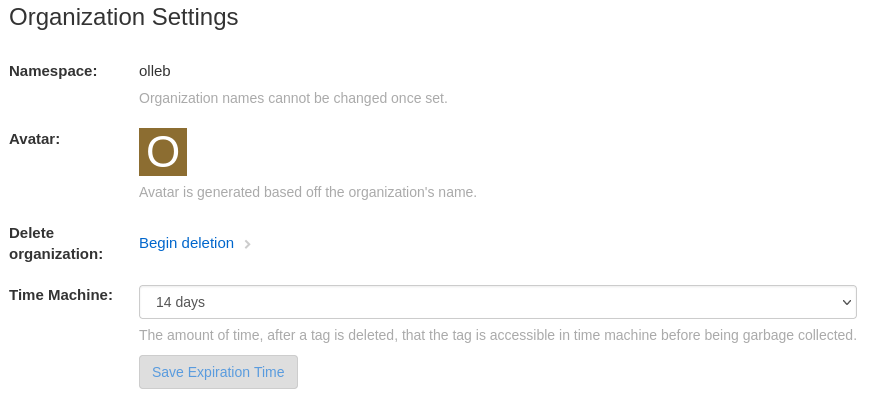
If the image was stored under a user account instead of an organization, the setting can be found under User Settings.
The Time Machine retention period can be modified by changing the TAG_EXPIRATION_OPTIONS array property, which must include the default expiration value DEFAULT_TAG_EXPIRATION in its list.
For example, with the following custom configuration:
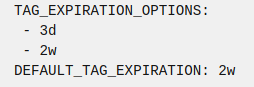
you will see:
