Workshop Setup
|
This tutorial was developed and tested with the following components:
|
Workshop Tools
The following tools are required to complete the exercises in this tutorial. Ensure that they are installed and properly configured before proceeding with any of the chapters.
| Tool | Reference |
|---|---|
|
|
|
|
|
|
|
|
|
|
|
|
|
| The source code for the extensions used in this workshop is available at: https://github.com/aolle/rhsso-workshop-code |
Deploying Red Hat Single Sign-On on OpenShift
Red Hat Single Sign-On can be deployed on OpenShift using either the Operator or the application template.
The Operator automates and simplifies administrative tasks in OpenShift through the use of custom resources (CRs). This means that you can create and manage Red Hat Single Sign-On resources declaratively, instead of configuring them manually through the admin console.
The Operator performs one-way synchronization of custom resources.
If a CR is modified directly (for example, using oc), the change appears in the Red Hat Single Sign-On admin console.
However, modifications made in the console do not propagate back to the CR definition.
|
If the Red Hat Single Sign-On deployment fails, check whether a LimitRange exists in the current OpenShift project.
Some RHPDS environments automatically create a LimitRange when new projects are provisioned.
Also verify the liveness and readiness probes — the initial delay may need to be increased.
|
| For this workshop, Red Hat Single Sign-On is assumed to be installed using the template and imagestream method described in Deploying Red Hat Single Sign-On for OpenShift using templates. Additionally, for convenience and simplicity, all applications and services will be deployed in the same OpenShift project as Red Hat Single Sign-On. |
Deploying Red Hat Single Sign-On Using the Operator
You can use the Red Hat OpenShift Container Platform web console to subscribe to and deploy the Red Hat Single Sign-On Operator.
The Operator simplifies the deployment process and is easy to use, though it is less flexible than the template-based deployment method.
Check the supported custom resources (CRs) here:
-
Open a browser window and log in to the Red Hat OpenShift Container Platform web console.
-
From the Administrator perspective, click
Operators, thenOperatorHub. -
In the Filter by keyword field, type
rhsso.
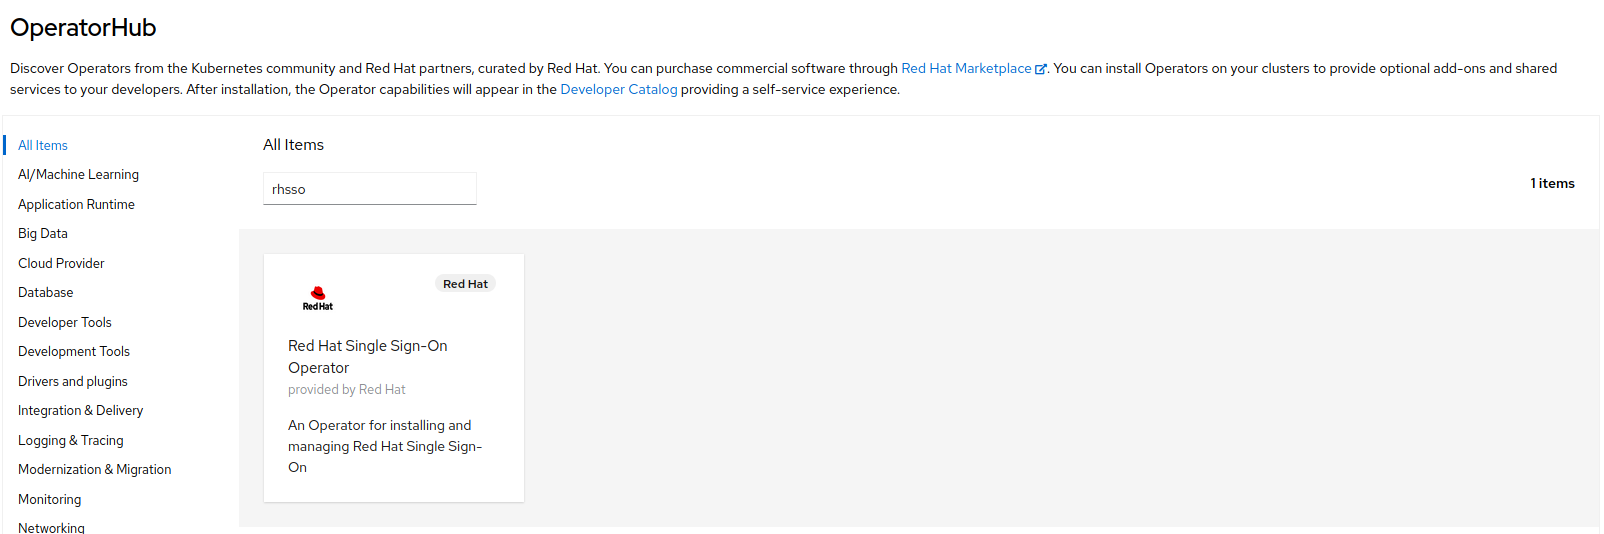
-
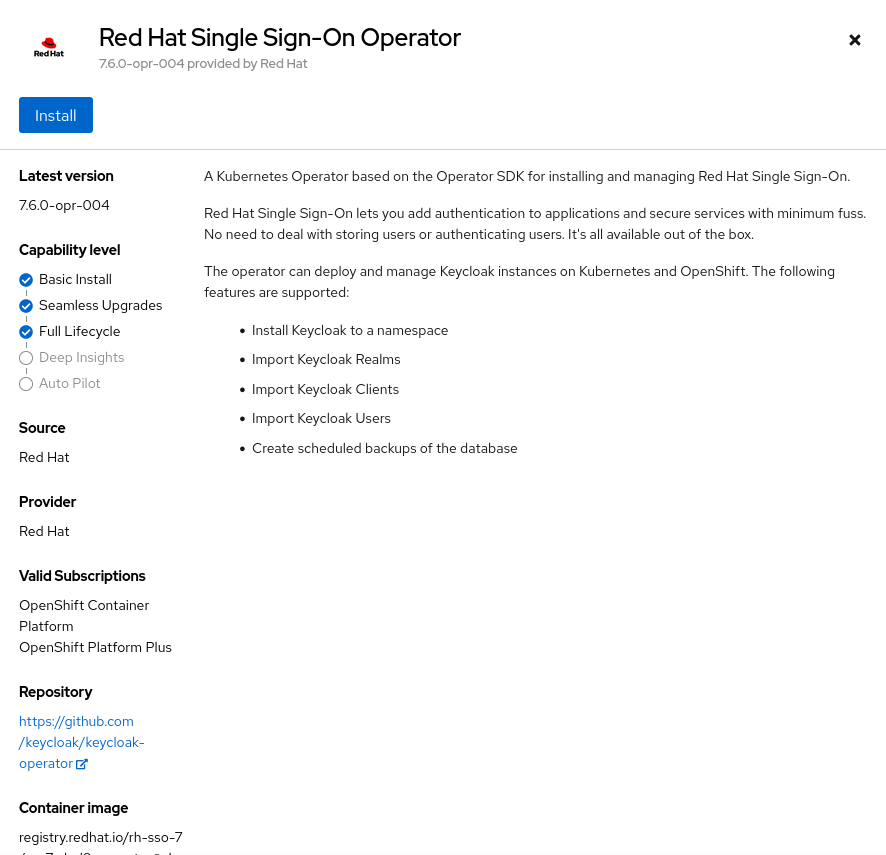
Select the Red Hat Single Sign-On Operator tile and click
Install.
-
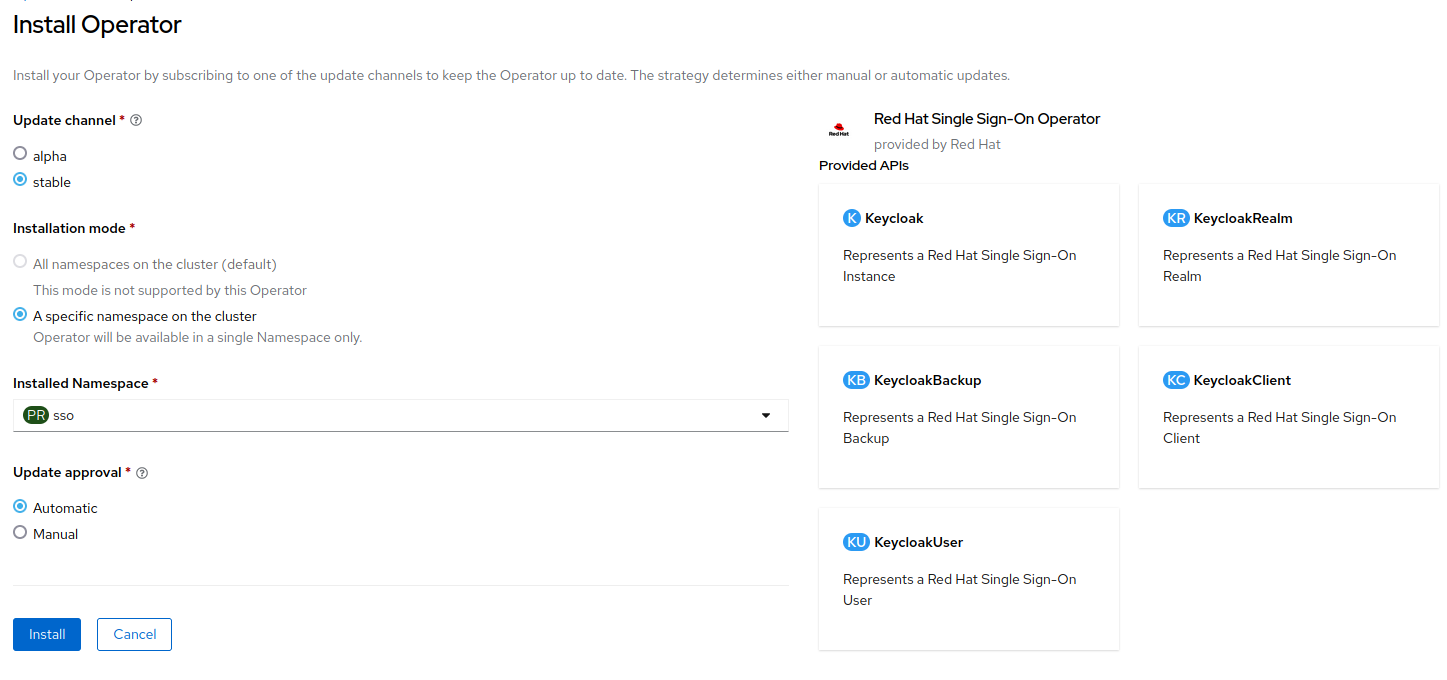
On the Install Operator page, leave
stableas the selectedUpdate Channel. The Operator supports only the A specific namespace on the cluster installation mode. Create a new project namedsso, and choose Automatic update approval.
-
Click
Install.
Installing Red Hat Single Sign-On using a Custom Resource
-
From the Administrator perspective, click
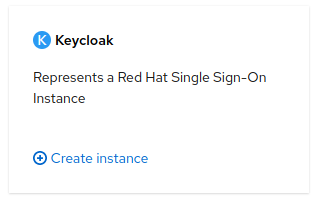
Operators, then selectInstalled Operators. Make sure thessoproject is selected. Then, select the Red Hat Single Sign-On Operator. -
Click
Create instanceon the Keycloak tile.
-
Change the
Nameif desired, then clickCreate.
Deploying Red Hat Single Sign-On Using Templates
-
Create the templates and install the Red Hat Single Sign-On image stream.
For this workshop, we will use the sso76-ocp4-x509-postgresql-persistent template, which deploys Red Hat Single Sign-On 7.6 on OpenJDK with a persistent PostgreSQL database for Red Hat OpenShift 4.x.
This template does not require manual creation of keystores or truststores.
|
oc replace -n openshift --force -f \
  https://raw.githubusercontent.com/jboss-container-images/redhat-sso-7-openshift-image/sso76-dev/templates/sso76-image-stream.json

oc replace -n openshift --force -f \
  https://raw.githubusercontent.com/jboss-container-images/redhat-sso-7-openshift-image/sso76-dev/templates/reencrypt/ocp-4.x/sso76-ocp4-x509-postgresql-persistent.json

oc -n openshift import-image rh-sso-7/sso76-openshift-rhel8:7.6 --from=registry.redhat.io/rh-sso-7/sso76-openshift-rhel8:7.6 --confirm-
Create a new project.
oc new-project sso-
Add the
viewrole to thedefaultservice account.
oc policy add-role-to-user view -z default -n sso-
Deploy the template.
oc new-app --template=sso76-ocp4-x509-postgresql-persistent
Take note of the auto-generated RH-SSO Administrator Username and RH-SSO Administrator Password, as they will be required to log in to the Red Hat Single Sign-On admin console.
|
You can verify that all pods are running successfully by executing oc get pods -n sso before accessing the admin console.
|
Deploying Identity Management (IdM/FreeIPA)
This section explains how to install FreeIPA — an Identity Management (IdM) solution that integrates Linux, 389 Directory Server, MIT Kerberos, NTP, DNS, and Dogtag Certificate System components.
FreeIPA is the upstream project for Red Hat Identity Management.
Later in this workshop, we will integrate Red Hat Single Sign-On with IdM/FreeIPA.
To get started, remain logged in to your Red Hat OpenShift platform and, for convenience, select the sso project that was created previously.
Follow the steps below to deploy a FreeIPA instance on Red Hat OpenShift.
# Export the image to be deployed
export IMG=quay.io/freeipa/freeipa-openshift-container:latest
export IMG_BASE=${IMG}

# Clone the repository and deploy the roles and SCC
# Alternatively, a remote build can be performed instead of cloning the repository
git clone https://github.com/freeipa/freeipa-openshift-container.git
cd freeipa-openshift-container/
kustomize build deploy/admin | oc create -f -

# Create the OpenShift template and deploy it
make template-create
make template-new-app
Write down the IPA_ADMIN_PASSWORD and IPA_DM_PASSWORD values displayed in the terminal — they will be required later.
|
Once the deployment is complete, open the FreeIPA administration console to verify that access and credentials are working correctly.