Environment Setup
|
This tutorial was developed and tested with:
|
Workshop Tools
The following tools are required to run the exercises in this tutorial. Please ensure that they are installed and properly configured before proceeding with any of the tutorial chapters.
| Tool | Reference |
|---|---|
|
|
|
|
|
|
|
|
|
|
|
|
|
| The extensions source code used during this workshop can be found at the following URL: https://github.com/aolle/rhbk-workshop/code |
Deploying Red Hat build of Keycloak on OpenShift
Deploying Red Hat build of Keycloak on OpenShift using the Operator
-
Open a browser window and log in to the Red Hat OpenShift Container Platform web console.
-
From the Administrator perspective, click
Operators, thenOperatorHub. -
In the Filter by keyword field, type
rhbk.
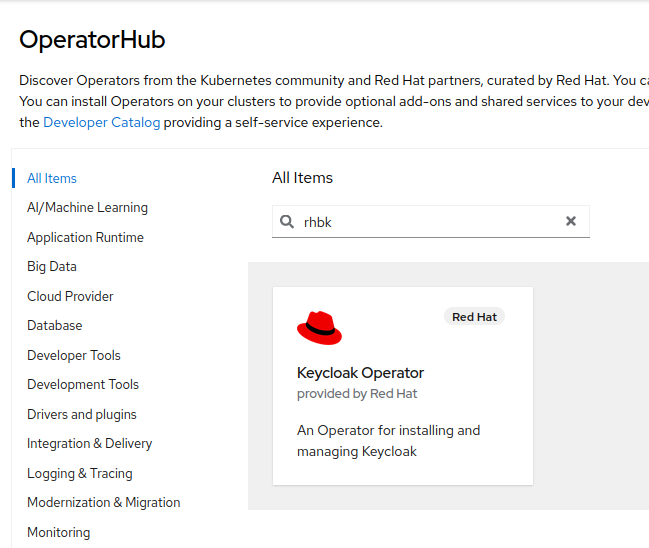
-
Select the
Keycloak Operatortile and clickInstall.
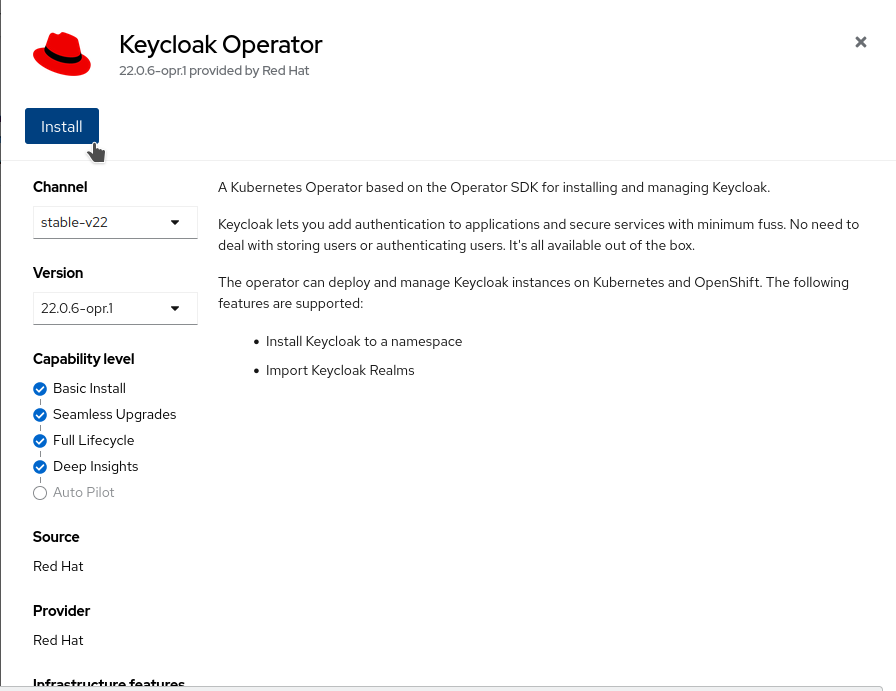
-
On the Install Operator page, leave
stable-v22from the list of availableUpdate Channeloptions. The Operator supports only theA specific namespace on the clusteras installation mode. Create therhbkproject. ChooseAutomaticupdate approval.
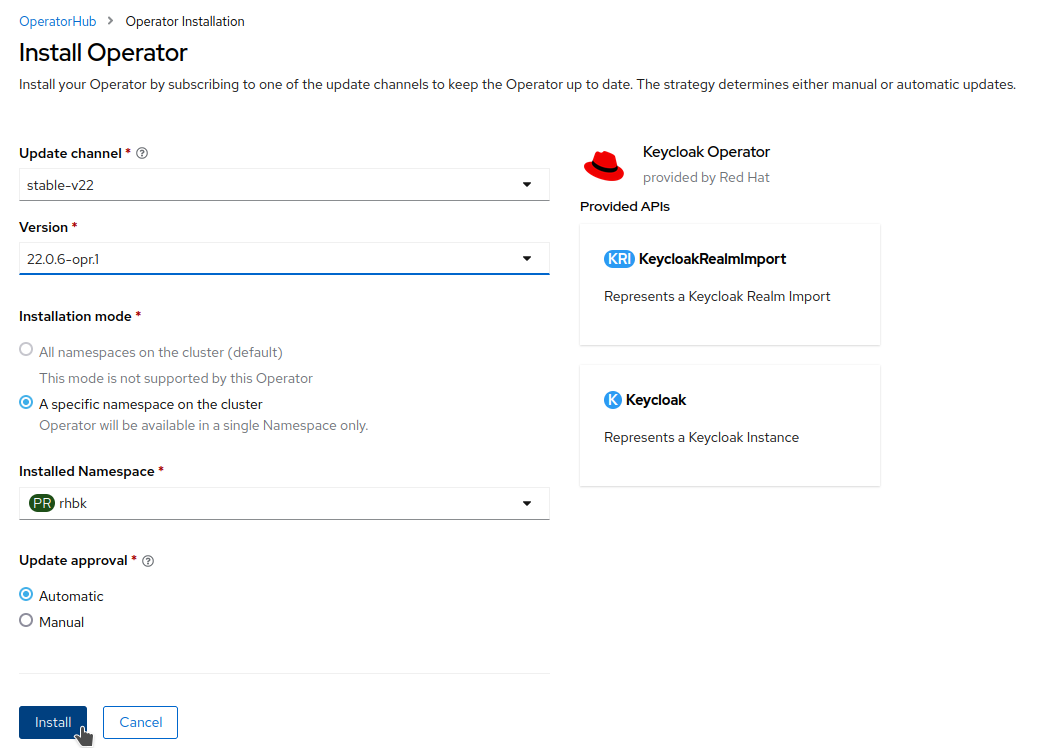
-
Click
Install.
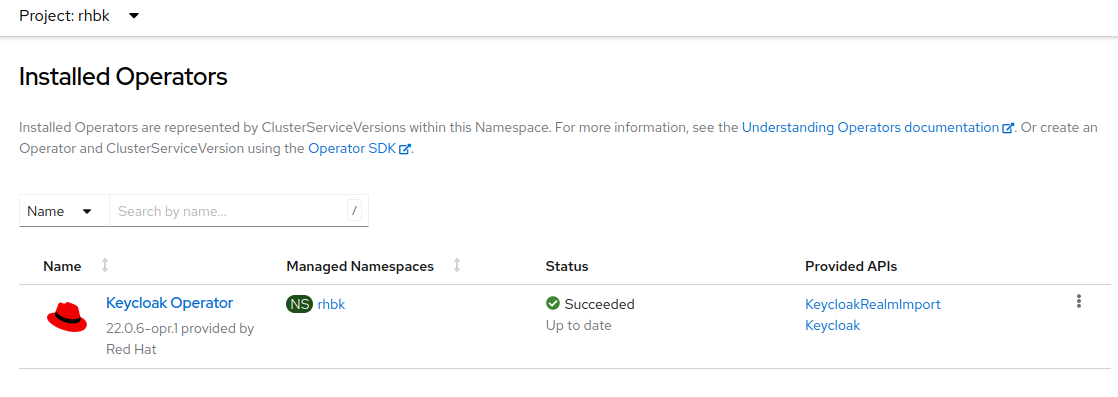
Once installed, the Keycloak Operator should appear in the list of installed operators, accessible from the Operators menu under Installed Operators.
Keycloak requires specific prerequisites (unless it is initiated with start-dev) that we will proceed to install and configure.
Let’s set up the database that Keycloak will rely on. In this workshop, we’ll opt for a PostgreSQL database installation.
-
Deploy the database instance:
-
Create the secrets:
oc -n rhbk create secret generic keycloak-db-secret \
  --from-literal=username=keycloak \
  --from-literal=password=keycloak
The YAML file already includes the database’s keycloak username and password, which is adequate for a workshop. In a production environment, it’s essential to securely define these fields, and it’s recommended to store them in a secret.
|
-
Deploy the Red Hat Build of Keycloak Instance:
| For the workshop, the Keycloak instance has been configured with plain HTTP enabled, and strict hostname resolution has been disabled. In production environments, it is necessary to configure TLS and set the hostname according to the specific requirements. |
After deploying and ensuring the Keycloak instance is running successfully, we can access the administration console. The default credentials are generated randomly during the deployment. To retrieve them, we need to check the generated secrets as follows:
-
Obtain the secrets and decode them.
oc -n rhbk get secret example-keycloak-initial-admin -o jsonpath='{.data.username}' | base64 --decode
oc -n rhbk get secret example-keycloak-initial-admin -o jsonpath='{.data.password}' | base64 --decode| In production environments, it is advisable to change the randomly generated default credentials and enable multi-factor verification for enhanced security. |
-
Try accessing the administration console using the provided credentials.
1.3 Deploying an Identity Management (IdM/FreeIPA) on Red Hat OpenShift
This section explains how to install FreeIPA, an Identity Management (IdM) solution that combines Linux, 389 Directory Server, MIT Kerberos, NTP, DNS and Dogtag.
FreeIPA is the upstream version of Red Hat Identity Management.
Later on, we will see how we can integrate Red Hat build of Keycloak with IdM/FreeIPA.
To get started, stay logged in into your Red Hat OpenShift platform, and for convenience, select the kc project that has been created previously. Follow the steps below for deploying a FreeIPA instance on top of Red Hat OpenShift.
# export the image that we are going to deploy
export IMG=quay.io/freeipa/freeipa-openshift-container:4.9.8
export IMG_BASE=${IMG}

# clone the repository and deploy the roles and scc
# if preferred, a remote build could be performed instead of cloning the repository
git clone https://github.com/freeipa/freeipa-openshift-container.git
cd freeipa-openshift-container/
kustomize build deploy/admin | oc create -f -

# create the ocp template and deploy it
make template-create
make template-new-app
Write down the IPA_ADMIN_PASSWORD and IPA_DM_PASSWORD displayed on the terminal; we will need it later.
Open the FreeIPA administration console to verify that the access and credentials are working properly.
