OpenID + JWT
This tutorial demonstrates how to implement an OpenID Connect flow with a JWT implementation.
We will set up a new realm in Red Hat Build for Keycloak and configure it. Subsequently, we will deploy the stack and configure user access, enabling roles for various operations.
Architecture
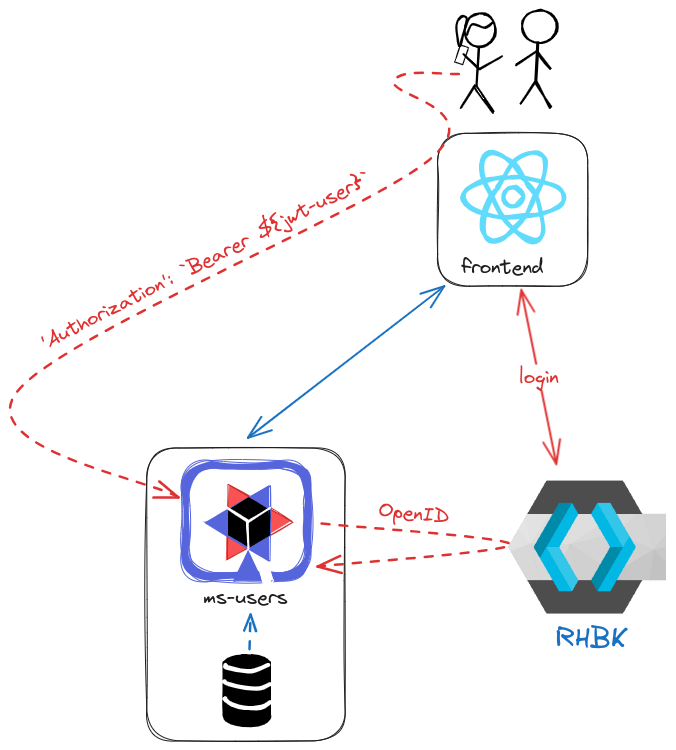
Firstly, we require an instance of Red Hat Build for Keycloak to manage access across our applications. One advantage of implementing OpenID Connect with JWT is the seamless integration of various applications and frameworks, facilitated by libraries available for each.
In this instance, we will construct a comprehensive architecture involving several microservices. The frontend is developed in ReactJS, responsible for displaying the data.
The user backend microservice, built with Quarkus, showcases a straightforward integration between Keycloak and the application, thanks to its OpenID library.
Red Hat Build for Keycloak configuration
This section outlines the process of creating a new realm using the OpenID Connect flow and provides guidance on its configuration.
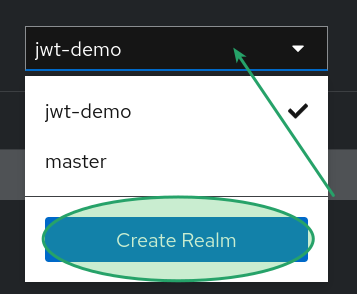
Create a realm
A realm in Red Hat Build for Keycloak functions as a domain where clients, users, roles, etc., can be configured. In this example, we offer an import containing the configuration to execute this workshop. Nevertheless, we are creating one from scratch to illustrate all the processes:
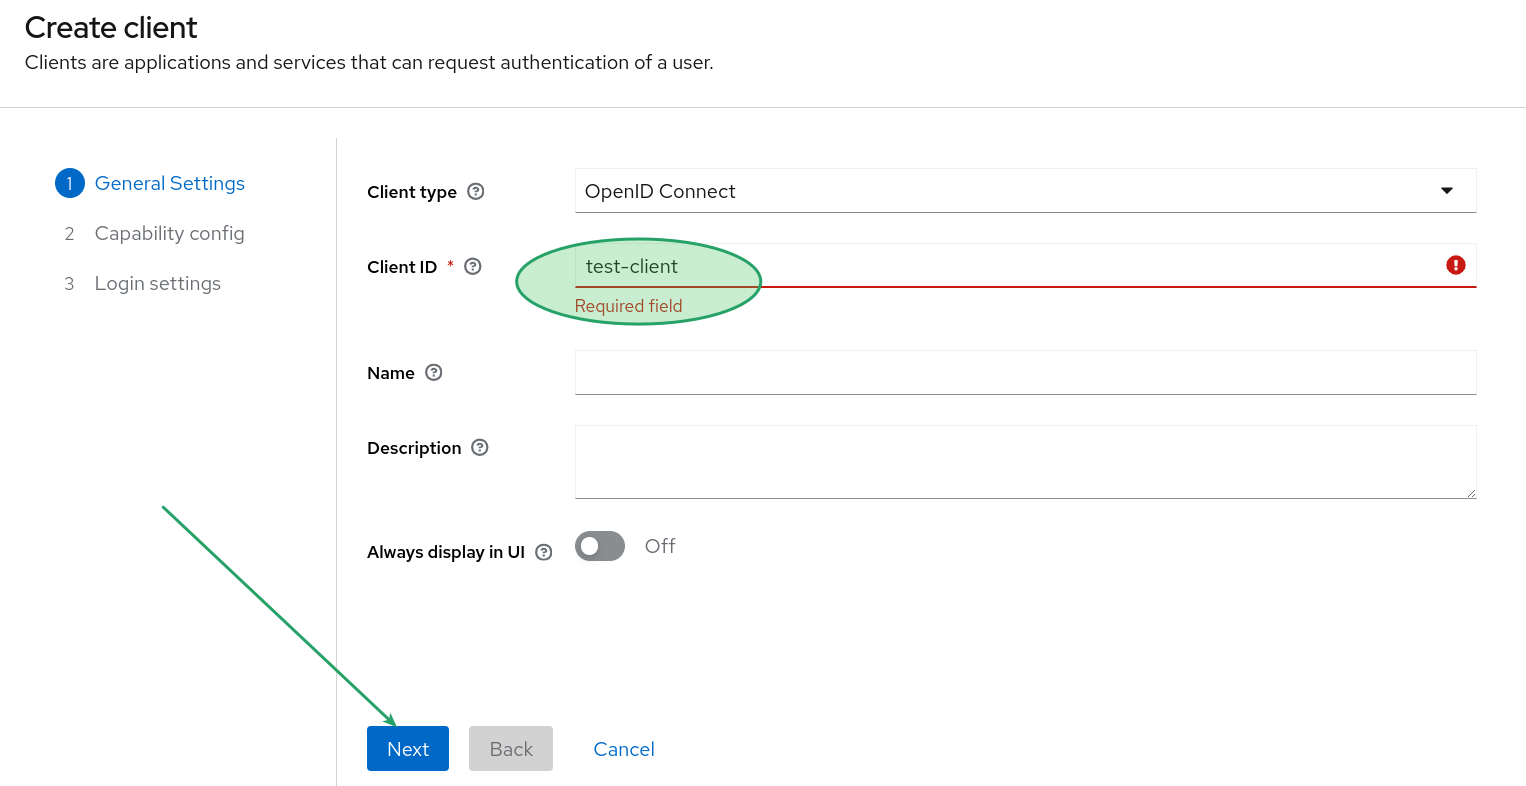
Create a client
A client in Red Hat Build for Keycloak serves as a consumer. Since we are employing an OpenID Connect flow, the selection of a standard or implicit flow depends on whether we are configuring a private or public client.
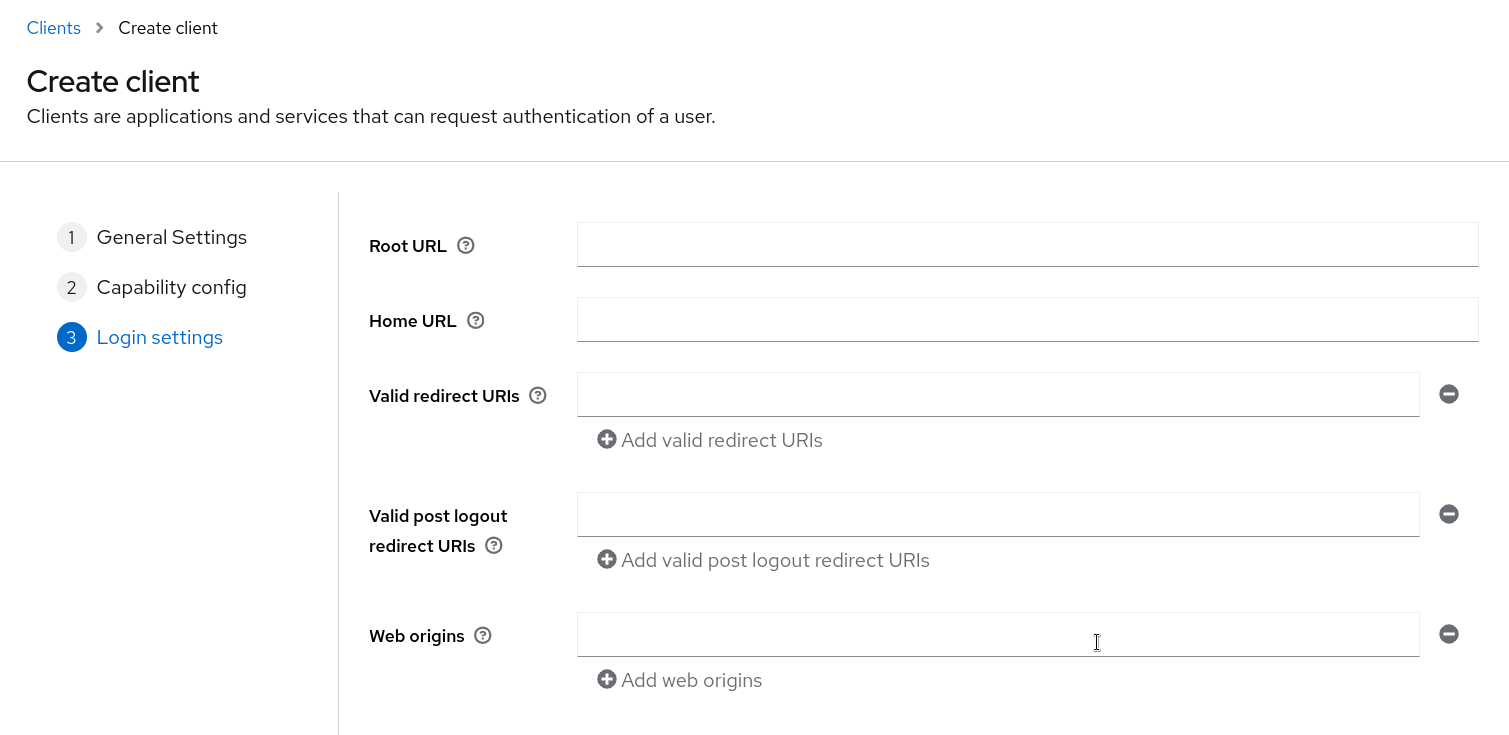
To register a new client, navigate to the Keycloak admin console and access the client options. In this section, locate the "Create client" option.
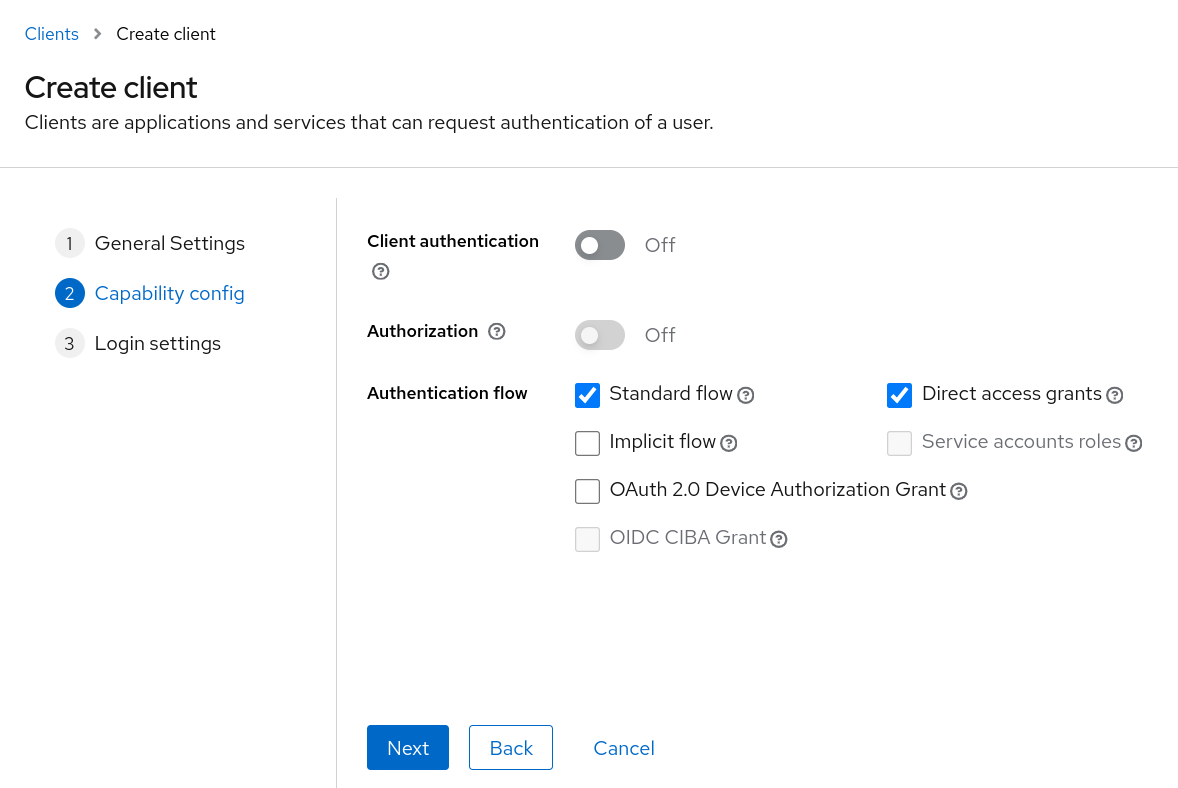
The next step depends on the flow we choose. In this workshop, we will opt for the standard flow for backend applications and the implicit flow for the frontend application.
The final step involves configuring security parameters, including web origins, redirect URLs after a successful login, etc.
Backend
Now, let’s proceed to configure and secure a backend service. In this case, we are using Quarkus to develop the application.
The application serves as a backend service designed to store a list of users for a sports center.
Find the backend URL
The front-end application consumes the back-end application, and it is crucial to be aware of the following URL:
oc get route -A | grep ms-users | awk '{print $3}'Red Hat Build for Keycloak configuration
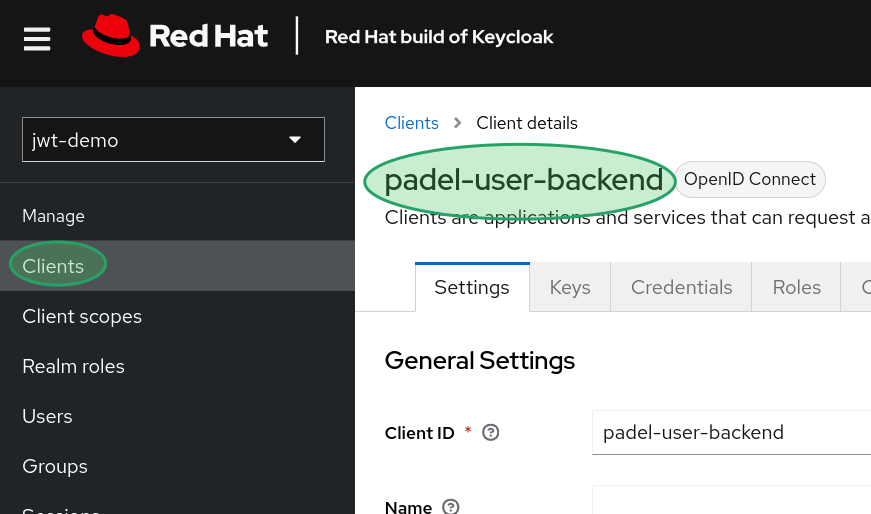
The Keycloak instance includes a realm that has been configured with a dedicated client tailored for this workshop.
This application functions as a backend service utilizing a standard flow with a private client. In the upcoming section, you will find all the necessary configurations.
If you want to review the OpenID Connect client configuration and explore the Red Hat Build for Keycloak admin console, please navigate to the following section.
Quarkus configuration
Quarkus streamlines the security configuration in our backend services. To achieve this, we need to import the corresponding library. In this case, even though we are working with Red Hat Build for Keycloak, since it follows the OpenID Connect protocol, we will utilize the quarkus-oidc generic library.
    <dependency>
      <groupId>io.quarkus</groupId>
      <artifactId>quarkus-oidc</artifactId>
    </dependency>
At this stage, we only need to configure some properties to specify where and how to use the OIDC server:
quarkus.oidc.auth-server-url=http://localhost:8080/realms/jwt-demo
quarkus.oidc.client-id=padel-user-backend
quarkus.oidc.credentials.secret=0unvbdWCBWcFMQUyVukqA6TQuHHWjj9x|
The client secret is the password used by the client application, and it’s crucial to handle it securely. |
With the configurations in place, we can now proceed to secure the endpoints of our backend application.
Secure the application
Another advantage of using Quarkus is its user-friendly approach. Securing the application endpoints is simplified using annotations.
To secure applications, we have two options: a generic approach or a fine-grained one. The primary distinction lies in specifying user roles using @RolesAllowed({ }) or not using @Authenticated in the application controllers.
Quarkus automatically handles client authentication, authorization, and roles management.
CRUD operations
CRUD represents all the fundamental REST operations performed on a domain: create, read, update, and delete.
The level of security required varies depending on the operation. In this case, we will explore the security measures for each of the main options.
How to get an access token
We will employ the curl bash client to test the remaining endpoints of the application. If you prefer a more visual approach, you can skip this section and proceed directly to the front-end application section.
To obtain an access token, we need to configure certain parameters that Red Hat Build for Keycloak requires.
|
In each request, it’s necessary to include the access token. You can request one in the following manner:
ACCESS_TOKEN=`curl \
  -d "client_id=$CLIENT_ID" \
  -d "client_secret=$CLIENT_SECRET" \
  -d "username=$UNAME" \
  -d "password=$PASSWORD" \
  -d "grant_type=password" \
  "$KCHOST/realms/$REALM/protocol/openid-connect/token"  | jq -r '.access_token'`
Create
Creating a new element in the domain is a restricted operation that should only be performed by an admin. We have a dedicated role for admins: padel-users-admin.
The application must prevent the connection and return a 403 error to any user without sufficient permissions:
  @POST
  @RolesAllowed({ "padel-users-admin" })
  public Uni<User> create(User user) {
    return Panache.withTransaction(user::persist);
  }
To test the creation of a user, you can use the following command:
curl \
  -X POST \
  -H 'Authorization: Bearer '$ACCESS_TOKEN \
  -H 'Content-Type: application/json' \
  --data '{"name":"David", "year": 1988, "level": 3.12, "username":"dborrego"}' \
  localhost:8081/users
{"id":1,"username":"dborrego","name":"David","year":1988,"level":3.12}
Find
We permit any user to retrieve their own information, so we require some filters.
The first control is to verify if the user is logged in with the correct role to access the application.
The second control ensures that the application confirms it is only attempting to retrieve its own user information. No user should be able to fetch another user’s data. A good analogy is a bank application where you can access your account information but not that of another account.
The final check involves extracting information from the token and incorporating it into the database query.
  @GET
  @Path("/{id}")
  @RolesAllowed({ "padel-users-player" })
  public Uni<User> ListById(Long id) {
    final String username = securityIdentity.getPrincipal().getName();
    Log.info(String.format("User %s find user with id %d", username, id));
    return User.<User>findById(id)
        .onItem()
        .ifNotNull()
        .transform(user -> {
          if (!username.equals(user.username)) {
            throw new WebApplicationException("El nombre del usuario no coincide", Response.Status.FORBIDDEN);
          }
          return user;
        });
  }
Now, you can attempt to retrieve your user information:
curl \
  -H 'Authorization: Bearer '$ACCESS_TOKEN \
  localhost:8081/users/1
{"id":1,"username":"dborrego","name":"David","year":1988,"level":3.12}
Frontend
In this section, we aim to create a new record in our system, but we need to configure some security measures.
Find the front-end application URL
oc get route -A | grep frontend | awk '{print $3}'Upon entering the application, you should see a message similar to this:
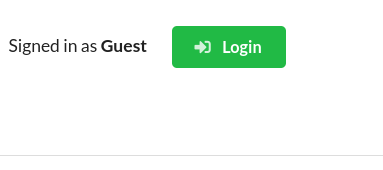
This message indicates that you have not logged into the application. So we have to log in. We need a user with enough roles to enter into the platform.
Create the user
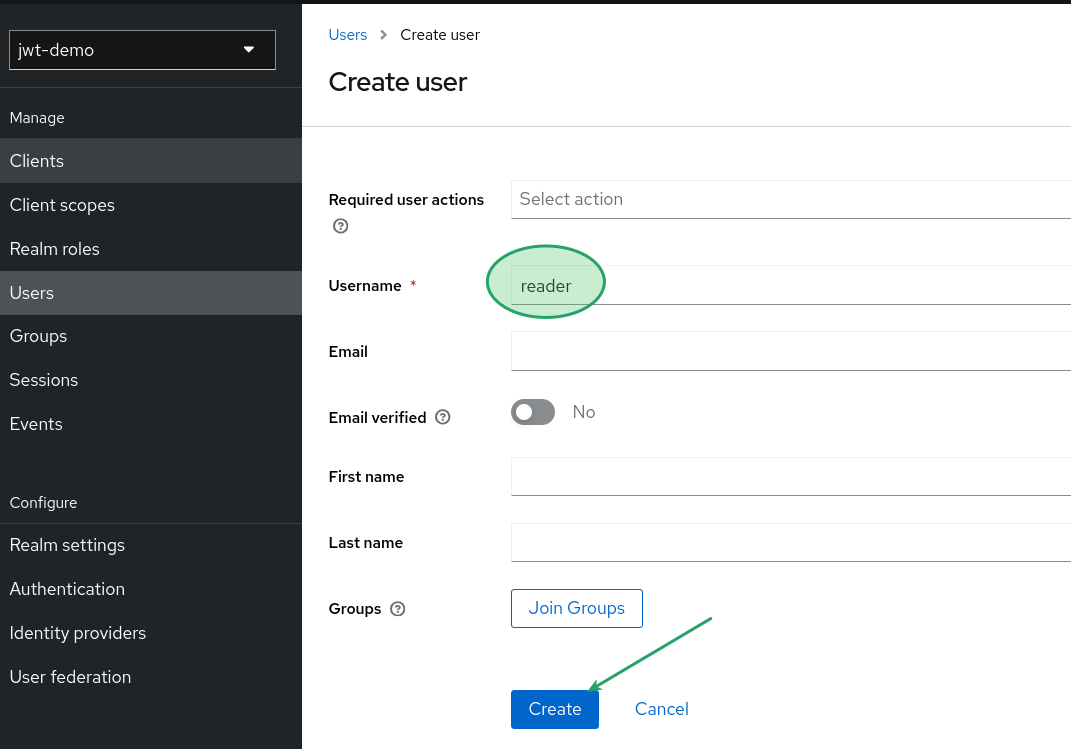
The initial step is to create a new user to demonstrate the entire configuration step by step. To do this, enter the Red Hat Build for Keycloak admin console, navigate to the "users" section, and click the "add user" button.
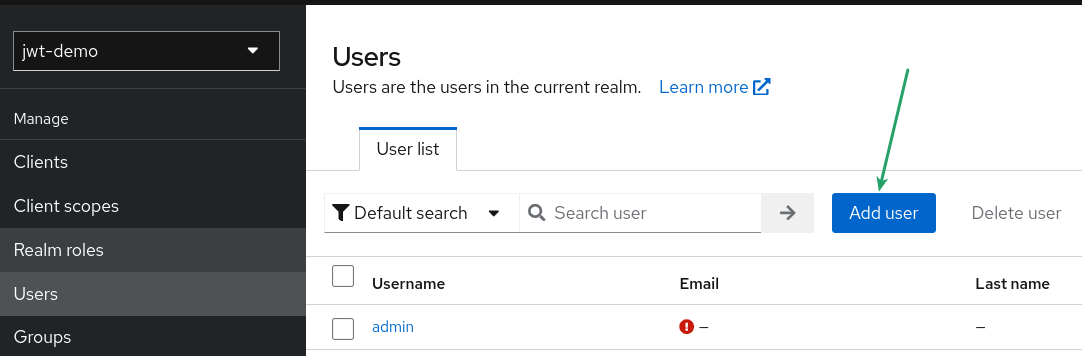
In the subsequent screen, you can choose various properties for your new user. For now, we will only set the name.
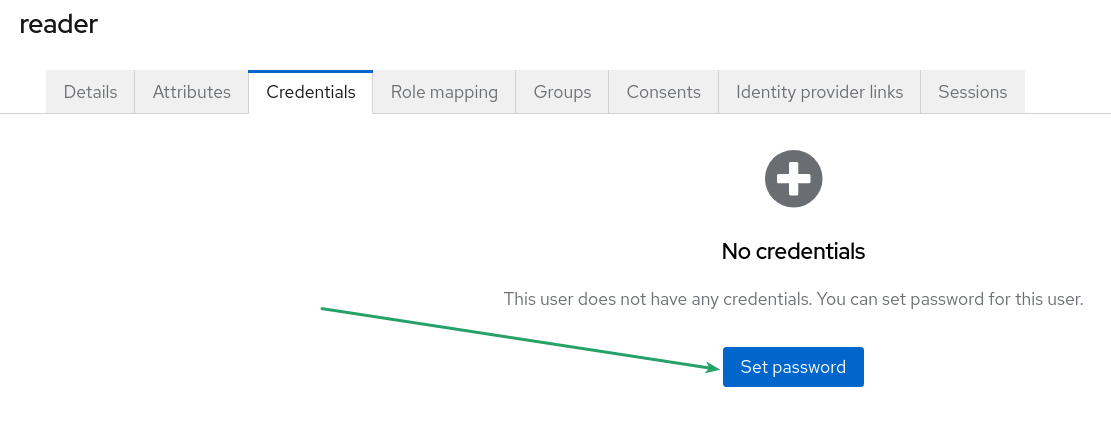
After creating the user, the next step is to set a temporary or permanent credential for access. To accomplish this, navigate to the "Credentials" tab and click the "Set password" button.
|
For this example, you can use any password you prefer, but I recommend using a simple password like "reader". |
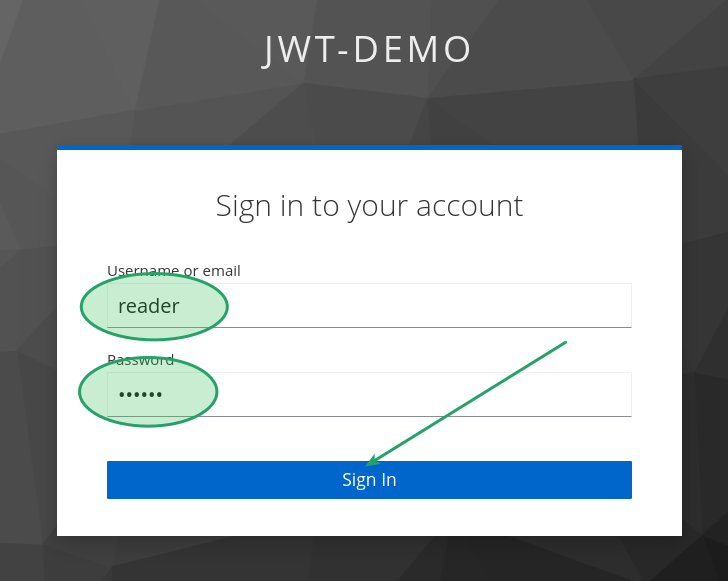
Login into the frontend application
Now that we have our new user, let’s return to the frontend URL and attempt to log in to the application. Click the green button, and the application will redirect you to the Keycloak login page.
Once you log in, you will be redirected to the main page, already signed in.
Now, you should see the following button:
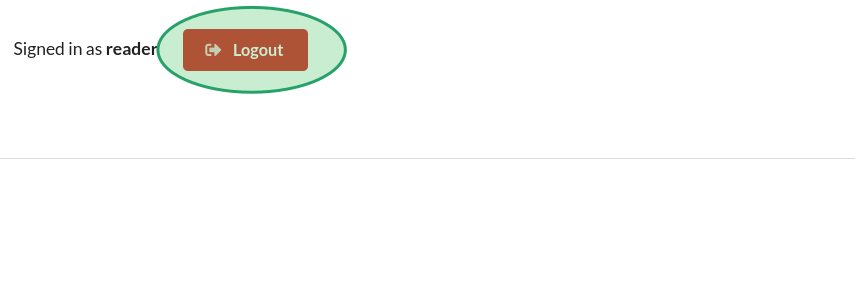
This indicates that you have successfully logged into the application. You may not see anything due to the ReactJS configuration.
ReactJS configuration
|
This section presents JavaScript code to illustrate how straightforward it is to configure a ReactJS application. Keycloak provides a library that can be easily integrated into any popular frontend framework. In this case, I’ve used |
We can examine and inspect the code. The variables isAdmin and isUser are responsible for controlling the user roles.
The Menu component renders the application menu based on these roles. Therefore, if the user is an admin, they will see the "users" option, and if they are a player, they can view the matches tab.
  const isAdmin = roles.includes('padel-users-admin');
  const isUser = roles.includes('padel-player');

  if (isAdmin || isUser) {
    return (
      <Menu borderless>
        {isAdmin && (
          <Menu.Item as={Link} to="/users">
            <Button color="blue" size="small">
              <Icon name="users" /> Usuarios
            </Button>
          </Menu.Item>
        )}
        {isUser && (
          <Menu.Item as={Link} to="/matches">
            <Button color="blue" size="small">
              <Icon name="soccer" /> Partidos
            </Button>
          </Menu.Item>
        )}
      </Menu>
    );
  } else {
    return null;
  }
Since we are working with a Single Page Application (SPA), users may be aware of the paths to access specific pages, such as the admin user’s page. The Keycloak library also manages this aspect:

Add roles to the user
At this point, we understand how the ReactJS security model relies on the user roles present in the JWT token.
Now, let’s proceed to add roles to users to enable private actions. The initial step is to return to the Red Hat Build for Keycloak admin page and locate the user named reader. Once you have identified the user, navigate to the "Role mapping" tab.
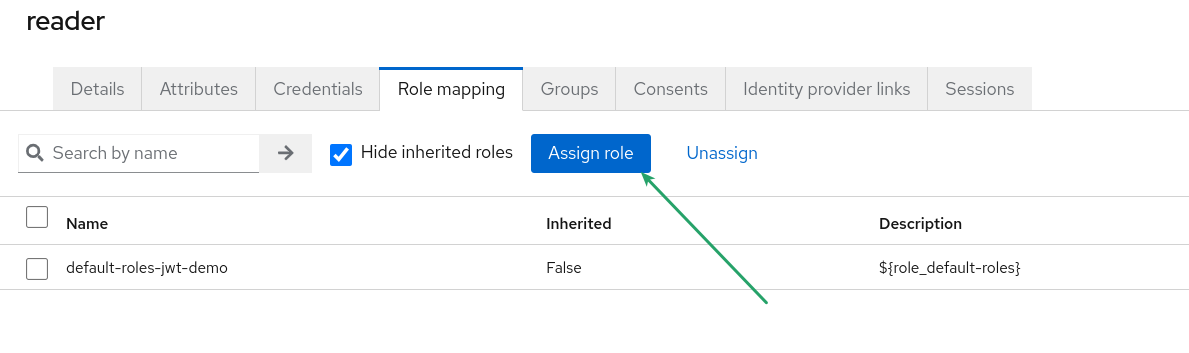
After clicking the "Assign role" button, Red Hat Build for Keycloak will display a list of all available roles in the system.
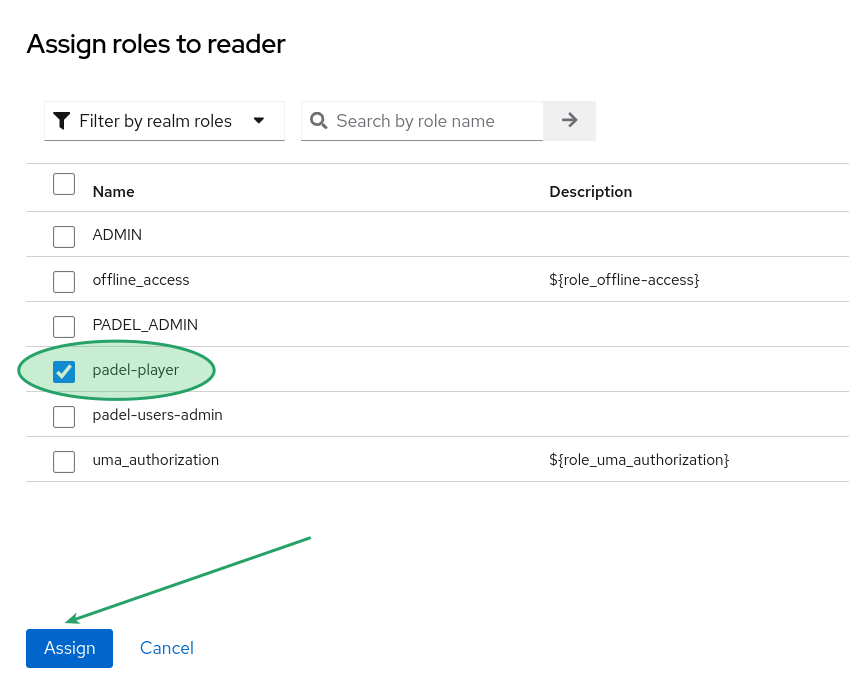
Select the role "padel-player" and click the "Assign" button.
Now, you can return to the front page. It’s necessary to log out and log back in to refresh the JWT token.
After doing so, your user will have the assigned role, and the front end will display the "Matches" tab.

Add role admin to manage users
Now, repeat the process to add a role to the user named reader. This time, assign the role padel-users-admin to the user. After completing this step, you should be able to see the main page like this:

Call the backend service
Now that we’ve learned how to manage security in both applications following the OpenID and JWT approach, let’s address the final point: integrating the two applications.
We need to propagate the JWT user token to the backend application. The backend receives the token and, based on the user’s role, allows or denies the operation.
export const createUser = async (domain, userToken, userData) => {
    const response = await fetch(`${BASE_URL}${domain}`, {
        method: 'POST',
        headers: {
            'Content-Type': 'application/json',
            'Authorization': `Bearer ${userToken}`
        },
        body: JSON.stringify(userData)
    });

    if (!response.ok) {
        throw new Error(`HTTP error! status: ${response.status}`);
    }

    return await response.json();
};